on How to Build an Empire
 |


Winter 2021
Valentine's Issue ❤️
Tracks-02-21 -- Model Railroading Newsletter
February, 2021

Building Your Model Railroad:
Tips, Techniques and Information
for All Ages and All Gauges

Tracks Newsletter - February, 2021
Articles in This Issue:
Refurbishing an Old Layout - Backdrop
DC & DCC together: A Valentine's Day Special ❤️
WiThrottle App with Digitrax LNWI
- Operating the NWP
- Building a Helix
- Using a Helix Kit
- Realistic Scenery: Landscape and Terrain
- Miniature Pine Forest
- Building a Bridge
- Live View of the Horseshoe Curve
- CSX Q410 Layout in Baltimore
WELCOME to the February, 2021 issue of Tracks - a monthly newsletter published by Building Your Model Railroad, devoted to providing breaking news and tips to model railroaders of all ages and all gauges in a quick and easy-to-read format. Resources are always credited where appropriate.
Whitelisting the email address of this newsletter is important. It assures that it doesn't end up in your Junk or Trash box every month. Please right click on the email address of the sender, copy the link and then go to your contacts program and paste it there as a new contact. You only have to do it once.
Note: √= sponsored link - See disclosure page for details. If you see a √ next to a link on this page or on the BYMRR.com site, that signals that the link is an ad. So if you click on it and purchase something, I might get a small (very small, I might add) commission on it. Just so you know.
Requests: If there are any particular subjects that you would like to see in the newsletter, please let us know at [email protected]. Even better, if you have a tip or something you would like to add to the newsletter, please send it in! Use the form in the Comments section of the BYMRR website.
*Videos: One of the most common requests that I get from the survey is to show more videos. I have included more than ever in this issue and will continue to do so as it seems to be appropriate. Incidentally, if you have not already done so, I would highly recommend upgrading to YouTube Premium, mostly so that you can play the videos without having to watch the ads. It's definitely worth it! (and I make no commision on that.)
Back Issues: And don't forget, there is a huge amount of information in the 33 issues of the old newsletter called BYMR-Zine as well as previous issues of Tracks. Back Issues are available here.
Thank you for subscribing. We have lots of new tips and tricks in this issue to add to your model railroading pleasure. And please tell your friends about us. The more we can spread the word about model railroading, the better.
Photos: We're always looking for new photos for our Gallery pages. If you have photos of your layout that you would like to share with other model railroaders, I'd love to post them on the site. Send them in to [email protected].
Contributions Encouraged: If you have a tip, picture, video or an article about model railroading that you would like to share in this newsletter, please let me know. I'm always looking for more information.
Surviving COVID
The vaccine is rolling out gradually, though not as fast as we would like. Nevertheless, there is hope for the future, assuming the vaccine can control the mutant strains that are now arising. Despite the vaccine, it still seems like the best way to avoid the thing is to stay inside and keep physical socialization to a minimum. Having something to do other than watch the news, is paramount to maintaining mental health, so I'm glad I have lots to do at home with regard to working on my layout and writing about it. In fact, I think I'll plead my case to the IRS that my model railroad is "medically necessary", so I can write it off on my income tax. Somehow, I doubt that will fly.
This issue is a little late because I've had my hands full with my other jobs recently. But I'm catching up so watch out for more articles.
Refurbishing an Old Layout - Part 2: The Backdrop
I've been wanting to redo my backdrop for quite some time, so I finally gave in to my own demands. I started looking around for a nice photographed backdrop with a Fall scene in the Appalachian Mountains, which is the locale for my fictitious freelanced layout. On the Internet, I found the perfect scenery that I wanted - Fall colors with a mountainous background and blue sky with scattered white clouds. There were several options for sizes and types. I chose the heavy paper type first because it was cheaper (my first mistake), with instructions to use double-sided tape and spray-on Krylon adhesive. The size was 72" x 18" (my second mistake - too long and not high enough). It arrived in the mail and the colors were beautiful, bright and vivid (third mistake, too bright). The instructions clearly said that you should have a helper during installation. I was excited to get it installed, so on the next weekend, I put it up myself without a helper (fourth mistake).
So I took each sheet, put on the double-sided tape around the edges (on the top and sides), sprayed the adhesive onto the back of the sheet and also on the wall and attached the 72" sheets onto the wall, while reaching over 2-3' of layout surface (4' in the corners) and destroying a lot of scenery in the process (Oh well, I can fix that later, I thought to myself). When I looked at the finished product, the air went out of my balloon, and I quickly became very disappointed. There were too many bubbles that I couldn't get out, and even worse, the top edges were not straight. Repositioning the paper was impossible without tearing it. Also the height was too short. It need to be 30" high, rather than 18". I had previously thought I could just put a border of some kind on the top of the backdrop, but when I tried that, it just didn't look right.
I tried to fix the bubbles and straighten it out, but the paper became torn in several places. So then I cut out the sky from the paper and tried to just paint the sky above the mountains. I wasn't really happy with that effect either. The white edges of the paper were evident and the blue paint was too dark. My attempt to dry-brush the top edges of the mountains didn't work well either.
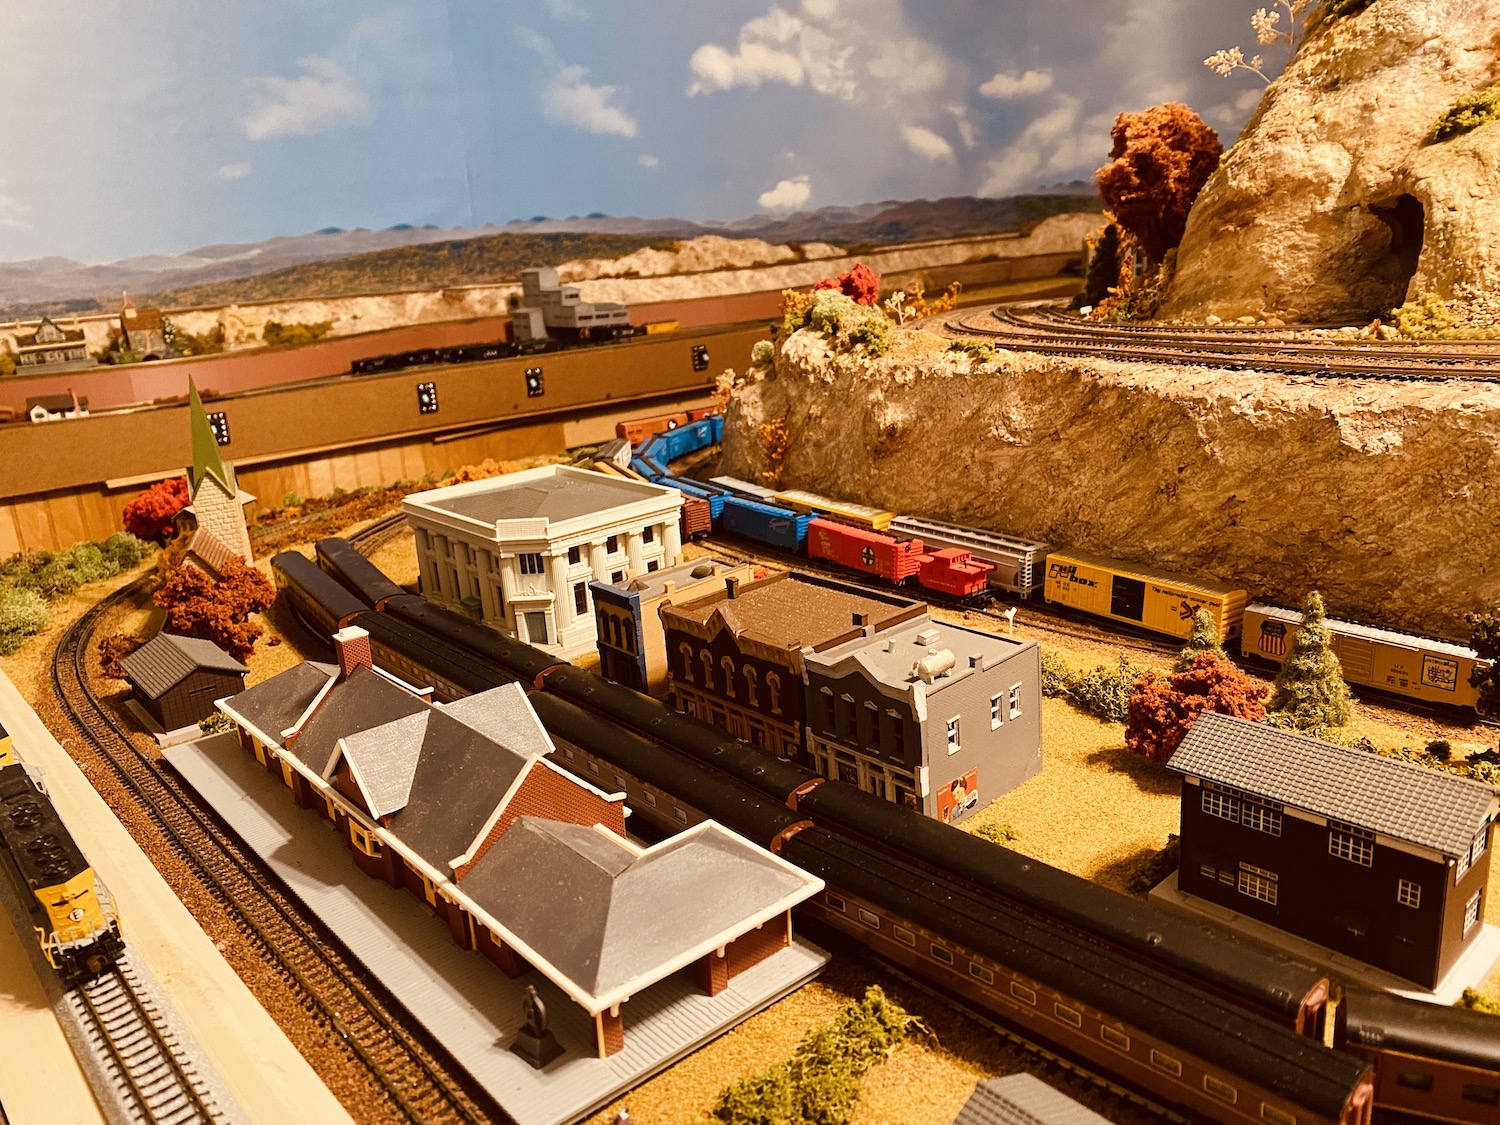
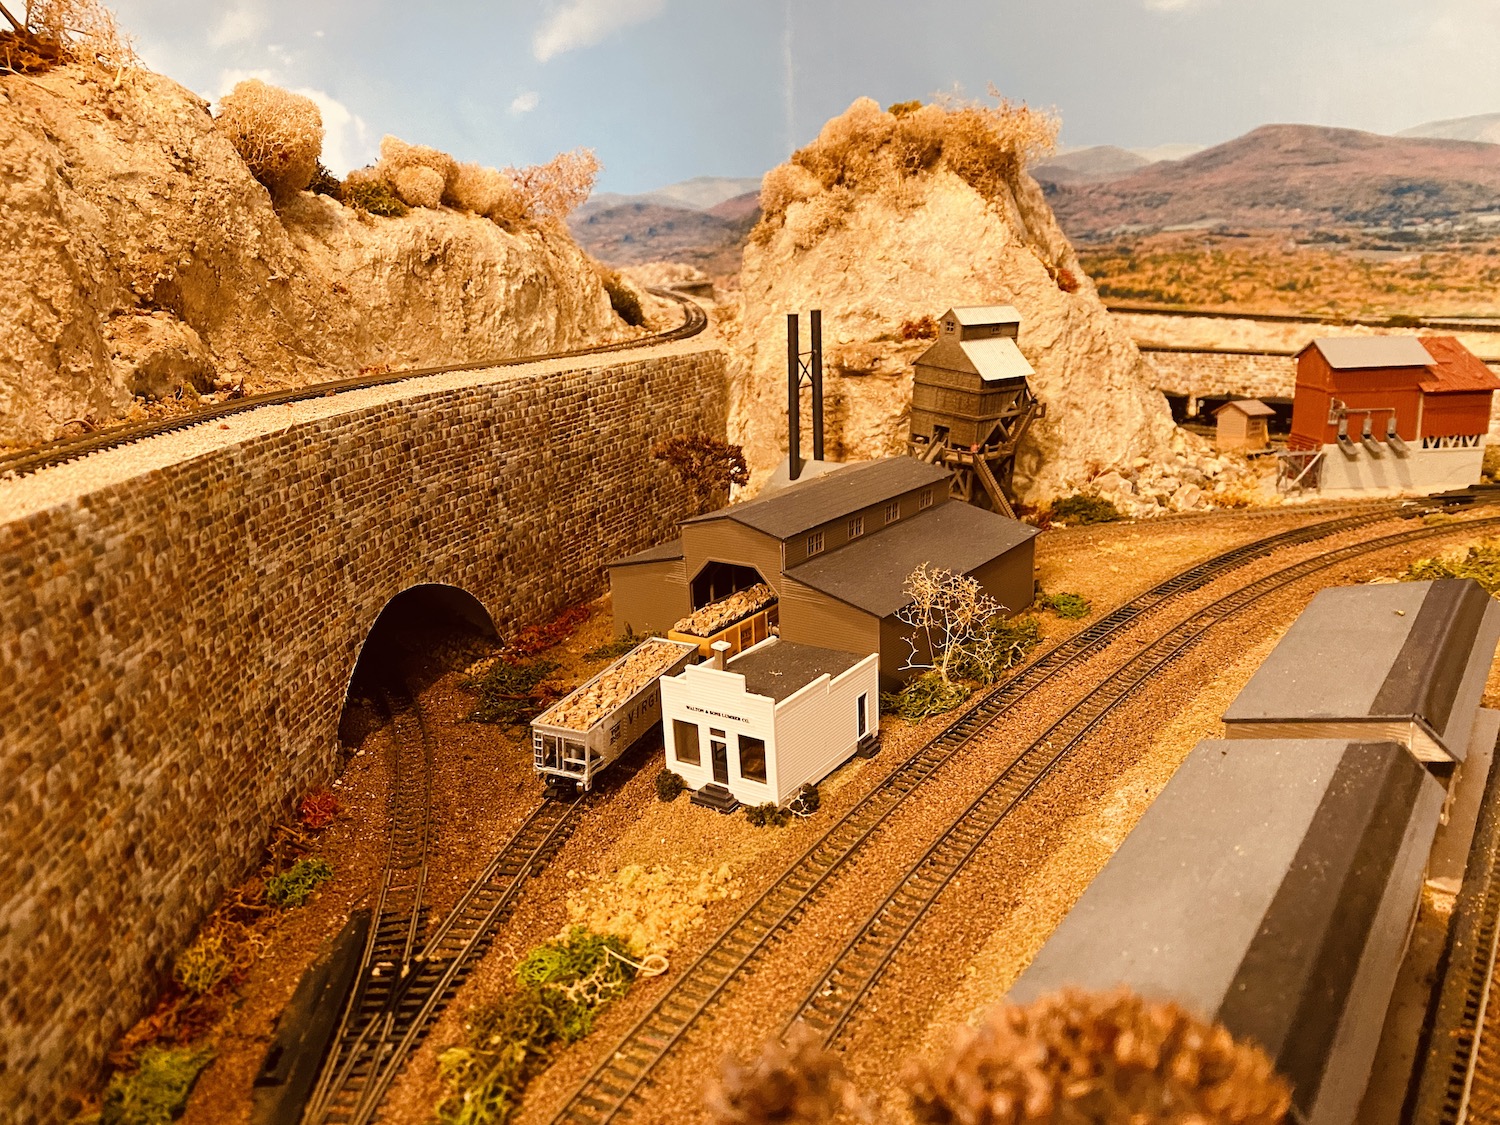
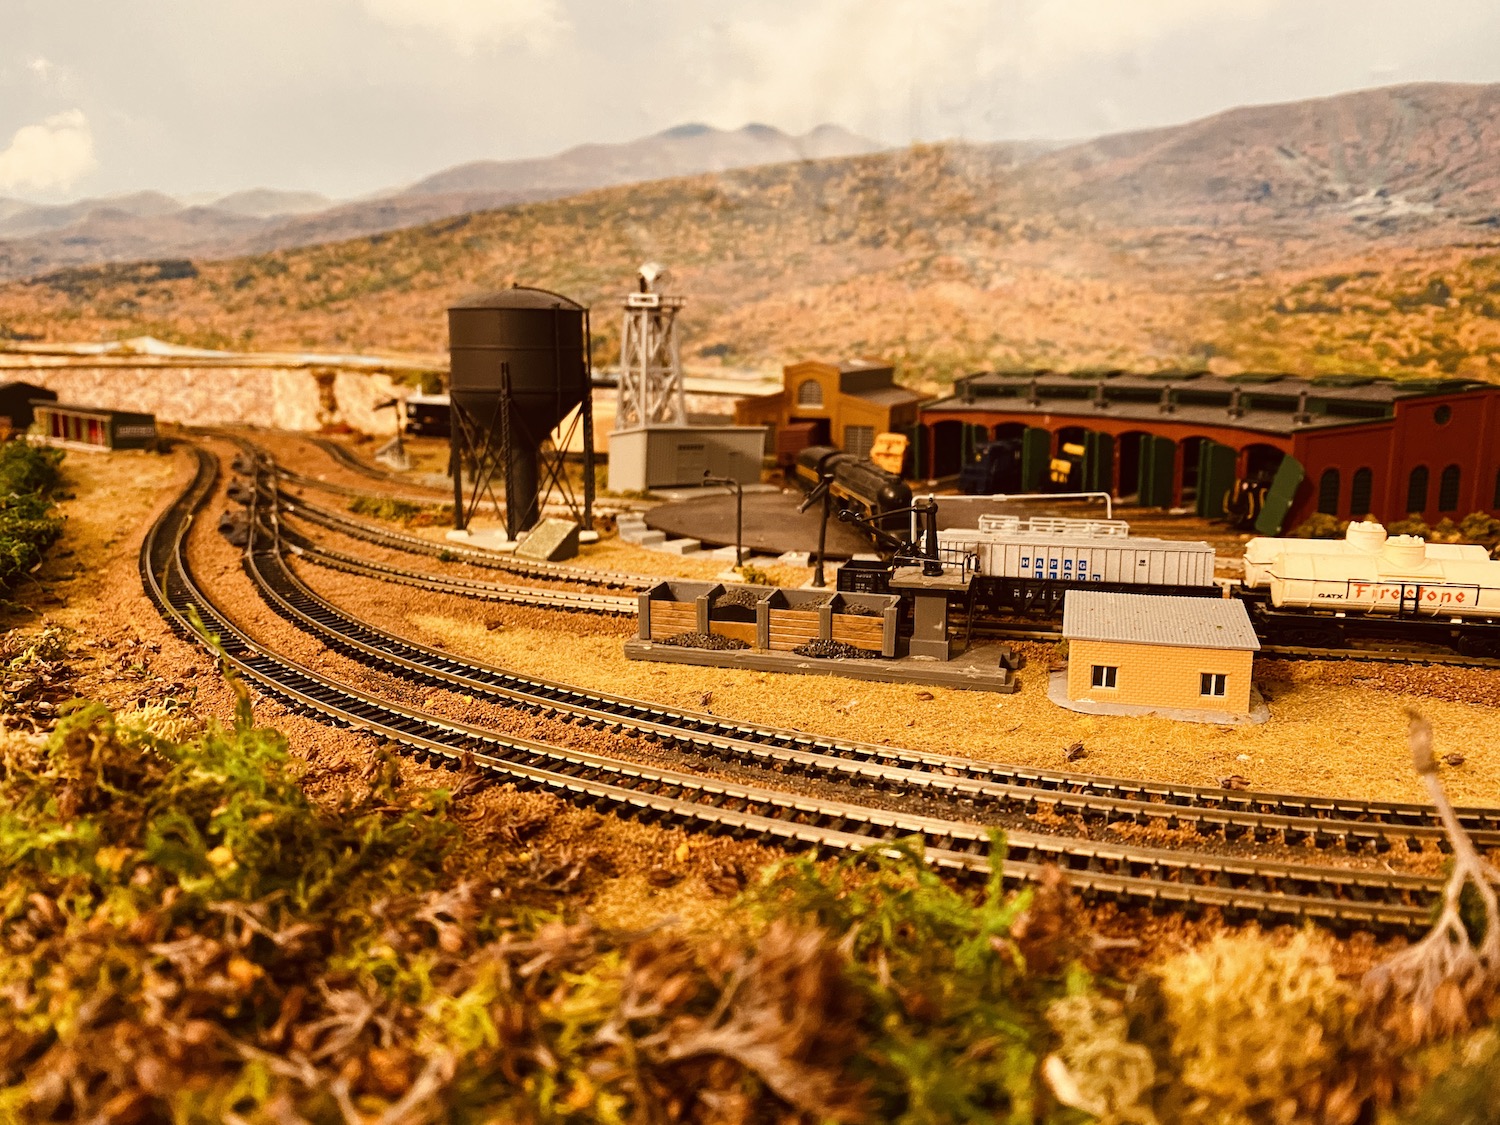
So, after a month or so of looking at this mess on the wall, I finally decided that life was too short to have to live with this. So, I purchased a different photographed backdrop in the form of 72" x 36" vinyl sheets with a more muted, distant, Fall-colored mountain scene. I then arranged for a helper and scheduled the installation for a weekend when we could both be there. I purchased a special glue that was made for attaching a vinyl wall covering that didn't dry immediately when you put it on, so that if you had to reposition the vinyl, you could do that. Using wallpapering tools, we were able to get most of the bubbles out. In one or two places where the edges didn't match up well, I was able to dry brush it so that those places were no longer visible. I wasn't quite finished with that when these pictures were taken.
I am now much happier with my backdrop. It looks great on the layout and in pictures, and since the colors are muted, it doesn't take away from the trains. I think the backdrop matches my layout scenery fairly well, which is also an important factor to consider when purchasing a photographic backdrop. It wasn't easy, but I was determined to get it done right. In the paragraphs above, I pointed out several of the mistakes I made so others may be able to avoid them.
Next, I need to redo a lot of the scenery that was destroyed in the process of installing the backdrop. Several feet of track were also destroyed in the worst possible place - in the corner of the layout. It will take some effort to fix this, but I needed to replace the scenery, track and a couple of turnouts in that area anyway.
Here are a few pictures with the new backdrop...

After reading this, you may be inclined to consider watching a series of videos on creating your own backdrop.
Modeler's Tips
Add these to your notebook of favorite model railroading tips:
- Painting Track: Most of the manufactured track that we buy is made of plastic and stainless steel, which doesn't really look very realistic when it's installed on the layout.One way to improve the realism is to paint the track, either before or after laying it. I did mine after installation, but after reading the article in Model Railroader by Lou Sassi entitled "How to Paint and Weather Track (June, 2014, p30), I think it would have been much easier to paint the track before installing it.Lou's method was to spray paint the whole piece - track and ties alike - with Red Oxide Primer, though you could use a dark brown or gray color just as well. Then he brush-painted the rails with Floquil Rail Brown. This color unfortunately has been discontinued, but you could choose a similar color or perhaps use a rust color for the rails. Then paint the ties a gray-brown color to contrast with the rails. If you wish to enhance the wood grain appearance of the ties, brush on a 30% strength wash of India Ink (70% isopropyl alcohol and 30% India Ink). Make sure you wipe the tops of the rails off with a soft cloth containing paint thinner before you finish each section. After the track dries, you're ready to install it. See the BYMRR.com page on track installation for more details. (reprinted with permission from BYMRR.com)
Here are a couple of videos focusing on painting, ballasting and weathering track that might be helpful...

- Changeable Scenery: I like to keep at least one section of my layout available for changeable scenery. In my case, I've used the left (or "west") corner of my layout for this purpose. One of the best ways to do this is to use a 1" thick foam sheet that is the same size as the area you want to replace. If you have used foam sheets for your layout surface, you can just cut out a scenery area of your layout, and redo it at your workbench. You'll want to use an area that doesn't have much track, so that changing the scenery won't impact the function of your layout much. It will just be something different to look at. You may wish to change the season in that area, or put in a different industry. Perhaps add a lake or a forest or even a city park. If you wish to keep the prior scene, then after you cut it out from your layout surface, make a template of the base by placing it on a foam sheet and tracing around the edges. Then cut out that section of your foam sheet and start creating a new scene on that. Carefully store your old scene in a box or on a shelf where it won't get damaged, so you can use it again in the future.
- Roadbed: If you have a lot of curves in your track-plan or if you have areas that will contain a lot of complicated trackwork, like in yards and crossings, before laying your track, consider placing a flat sheet of cork on your layout surface in that area. After positioning your track the way you want it, then cut out the cork on both sides of the track leaving the roadbed under the track intact. Save the remnants because they can be used for other parts of the layout. This saves a ton of work in laying roadbed in those areas.
- Super-elevating Track on Curves: Prototypical railroads often raise the outside rail of curved tracks to allow for a little more speed and traction when negotiating these turns. You can do this on your railroad as well by using strips of masking tape in varying lengths essentially creating a ramp for the outside rail of the curve. This might be especially helpful if you have a problem with locomotives tipping over when going around curve. Here is an article that explains how to do this... "Super-elevating Model Train Track Curves"
DC & DCC Together
Marrying DC and DCC together on the same layout is not difficult despite what you may have heard. I've done it on my layout for years. There are a few different ways to do this.
First you could have two mainlines on your layout - one for DC and one for DCC. Control the DC track with a regular DC transformer and control the DCC track with a separate DCC transformer (or, command control station, as it's called). You can even connect the two mainlines using a crossover section of track using rail gaps for electrical isolation.
Second, you can use a new type of transformer made by Model Rectifier Corporation (MRC) to run both your DC and DCC equipment, although not at the same time. The Tech 6 transformer has two modes of operation. If it is set for Standard Mode, you can operate DC trains just like you would with a regular transformer. If you push the button for Dual Mode, then you can operate your DCC trains just like you would with a DCC command control station. You can even program decoders with it.

There is another method that is not recommended any longer by most manufacturers. If you use Digitrax for your DCC command station, you can run DC trains using the address code 00 at the same time as running DCC locomotives using their specific address codes. I have done this for years without having any trouble, but it runs the risk of burning out some of your DC analog engines. The reason for this is that DCC works on alternating current (AC). If you try to run AC current through an engine that was designed to run on DC current, the engine may overheat and burn out, which would be an expensive repair if it happens. So only do this at your own peril.
A fourth consideration, and perhaps the best one, is to use a double-pole-double-throw switch (DPDT), such that when the switch is thrown in one direction, the layout is running on DC power. When the switch is thrown in the opposite direction the track is powered by DCC. Here is a video that shows you how to wire this up (soldering tips included)...
Basics of DC and DCC for beginners are outlined here...
Using a WiThrottle App Wirelessly with the Digitrax LNWI Interface
I recently purchased a Digitrax LNWI, which now allows me to wirelessly run trains using the WiThrottle App without requiring a computer or JMRI. The set up for this took less than five minutes. I was amazed at my new ability to run trains easily while walking around the layout , with no wires attached, using my iPhone. You could also use a mini-ipad for a bigger screen. If you have other devices set up with decoder control, you can operate those as well.
Here is a detailed video showing how it works...

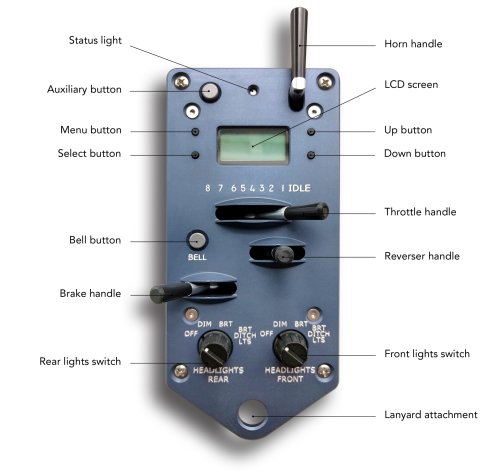
ProtoThrottle
And here is the NEXT biggest thing to use to operate your entire DCC layout wirelessly...
More Great Videos:
Operating the NWP
Building a Model Railroad Helix
Using a Helix Kit from Trackside Scenery
How to Make Realistic Model Railroad Scenery - Landscape and Terrain
How to Make a Realistic Miniature Pine Forest
Build an Awesome Model Railroad Bridge
Virtual Railfan Live View of the Horseshoe Curve in Altoona, PA
CSX Q410 Layout in Baltimore
Questions and Answers
Don't forget to check out our new Questions & Answers Page. If you have a burning question about model railroading, let us help. If we can't answer it, we'll find someone who can. See some examples here...
Check out our Hobby Central Train Station for all your train supplies - everything you need to build your own model railroad. (Also available: RC cars, trucks, planes, helicopters, games, puzzles, tools, gifts and much more.
- FREE SHIPPING on most items.
- Competitive pricing - especially considering free shipping.
- New discounted products added every day.
- FREE DVD with every order over $50.00.
- Also get a one-time 10% discount just because you read this newsletter. Use the secret Coupon Code: TRACKS-0221 at checkout.
Hope you enjoyed this issue of Tracks. Feel free to pass it on to your friends, family and other model railroaders. If you have a great tip or article that you would like to publish on the website, please let me know - The more, the better. Any comments or suggestions are always welcome. You can either go to the Comments/Contact Page and enter your suggestions there or contact me directly at [email protected]
Thank you for your support and for subscribing to the free newsletter for Building Your Model Railroad.
And, as always, thank you for visiting the BYMRR website at
https://www.bymrr.com. We are committed to providing all the newest techniques, tips and articles to help YOU build your own great model railroad!
Take care and be safe.
Greg Warth
Survey
Tell us what you think...
Back to Home Page
Contact Me | Blog | Photos | References | Supplies | GiftShop | Sitemap | Search | Comment | Privacy Statement | Disclosures
Tracks Newsletter: Sign Up Here!
√ = ad or sponsored link
What's New on BYMRR.com?
Recent Articles
-
15 piece train set
Nov 24, 24 07:47 AM
I was given this train set from a uncle that passed away im not sure what it is worth but i no its a N scale model and the hobbie is quite expensive so -
Lionel Miscellaneous
Nov 24, 24 07:42 AM
I have miscellaneous Lionel trains and accessories that I would like to sell. You can view more photos at www.EastHarbor.net/trains.pdf Please call or -
15 piece train set
Nov 24, 24 07:40 AM
I was given this train set from a uncle that passed away im not sure what it is worth but i no its a N scale model and the hobbie is quite expensive so
