on How to Build an Empire
Building My Empire
by Rivian Warder
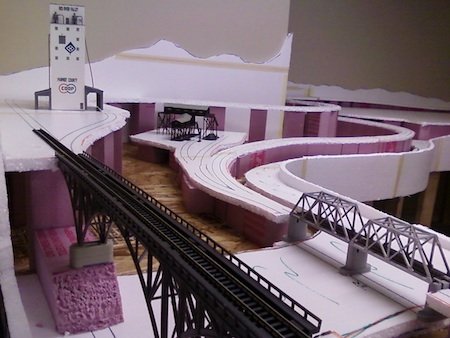
Hello whoever you are reading this.
I wanted to take a few moments and document the building of my train layout. I have surfed the Internet, and looked over many other people’s layouts trying to figure out how to build one myself. I found a guy who was going “step-by-step” through building his layout along time ago, but I can’t find it now. I did discover Greg’s web site and found a lot of good information here. I posted a challenge I was having, and within a day got some good advice. So I guess I would enjoy taking this opportunity to replace “That Guy” I found before, and document the building of my “N” scale layout here.
I feel I should give a little bit of my back-story so you’ll understand why I have some stuff already. I was fortunate enough to have a job that I could telecommute. My boss was getting irritated that I would not respond when he instant messaged me on the computer. So I started a train layout in my home office to keep me in the office during the down times. It wasn’t much, just some track tacked down to some fuzz board. I got 4 DCC locomotives, a few buildings, and some rolling stock. I tried to do some scenery but it didn’t turn out so well. Anyway… long story short I changed to a better paying job that required me to be in their office, tore down my office, and dismantled my layout.
Well here I am 3 years later and a victim of the economy. I was laid off, and now I am unemployed. My wife told me to go ahead and build my trains again. I don’t think I am very pleasant sitting at home with nothing to do. I decided to try to make a “REAL” layout (Like what I see on the Internet.) but being on unemployment my budget is tight. I will cut as many corners as I can and still get something I will be proud of. So the following is what I have done to build my train layout. I’ll put in the good, the bad, and the ugly. Like my momma used to tell me… “You have to learn from other people’s mistakes; you’ll never live long enough to make them all on your own.”
1st:
STAGE 1
Find a place in the house for a train:
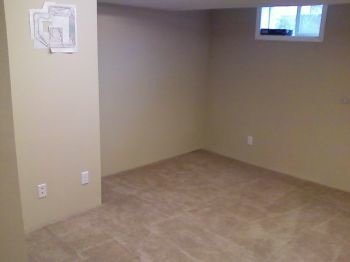
I had to clear out all the “Stuff” that piles up in the unused places of our homes. And try to figure out what I could put there. A few years back (before the walls were framed in our basement) I drew a layout I would like to someday build.
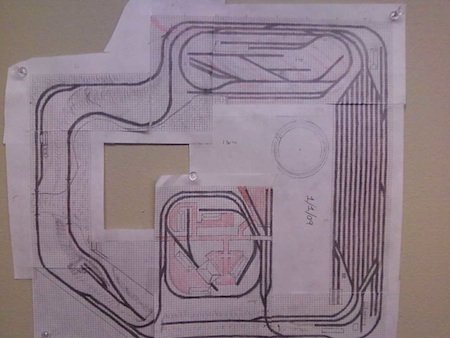
The newly built walls could not go completely where I thought they would go, so some modifications will have to happen. I know I personally like a complete circle. I wanted an outside track (express track) that a train can go in a continuous loop and look good while I was loading and unloading cars on another track. So this layout has an outer loop and an inner loop, they will connect at the staging yard. I also wanted my train to cross over a mountain that I could maybe cover in snow and make some kind of winter wonder land. So I researched how to make a “Grade” that would make my train go “up-and-over” something. It seemed that a 2% grade was the best. (Goes up or down 2 inches every 100 inches.) I decided to change that to 96inches because that’s 8 feet. The length of a sheet of plywood. I figured that 2 inches was not going to give me the separation I wanted between the inner track and the outer. So if I made the outer go “up” 2 inches and the inner loop go “down” 2 inches then I would get a 4 inch separation. That should do… I hope… we’ll find out.
STAGE 2: The build
I went to some construction sites and begged for scraps of plywood and 2x4’s. I was able to get some good scraps of plywood but no 2x4’s over 3ft. long. It was now that I realized that I will not live in this house forever, and may want to take this layout out of the basement. So I took the old drawing and divided it into sections. That way when I was done building it I could unbolt and take out. I found out that they call these sections “Modules”. I think that I can lay the track down and use a thin saw to cut the track so the train will go over the gap. I started to measure the perimeter and cutting the plywood to fit. In a couple of places I put one piece on top of the other and drew lines where to cut them so I knew I would get a good fit later.
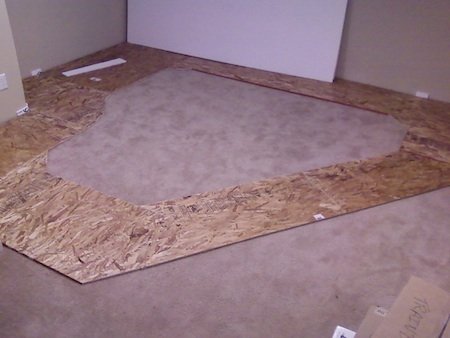
I then took the sections of plywood to become “Modules” and took them outside to frame in the 2x4’s. I basically put a 2x4 on edge around the perimeter of the piece of plywood. Anywhere I had more than 2 feet open gap I would put a 2x4 across the space… now to figure out how high I wanted the finished product to be. I liked the height of the kitchen counters, 36 inches off the floor. I figured I would have a ½ inch thick foam board, ½ inch plywood and 3 ½ inch wide 2x4. … Well crap! Here is where I figured I need space to put in landscaping detail. My track level will need to be well above the plywood. Back to the Internet I go… I discovered that most people put this 2 inch foam board on top of their plywood and the 2 to 4 inch foam risers on top of that… sheesh… money! I think I can make my own risers out of pieces of wood and glue the ½ in foam on top of that. We’ll see when I get there. I figured my track would be about 6 inches above the ply wood so I cut all my legs at 30 inches and started to attach them.
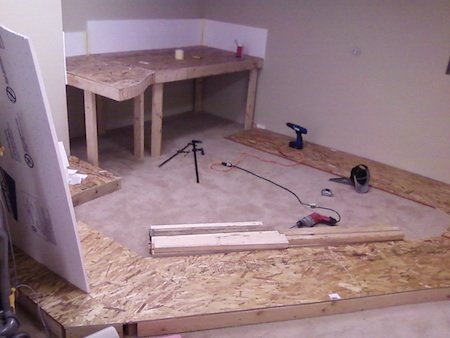
I did consider that I will want some background, and needed to install something on the backside of the modules before they are attached to each other. I broke down and went to home depot and bought the ½ inch foam board. I laid the pieces over the plywood and traced it, cut it, and was ready for when it was time to mark the track. I took the scraps and cut them into 16 inch strips to glue to the back of the modules for my background. I used Elmers spray adhesive and it didn’t work so well. So I borrowed my father’s hot glue gun. Now that’s the way to go. I went through a lot and I mean a lot of glue sticks. Once I had all the pieces with legs under them I put the ½ inch foam board on top and was ready to put down some track so I can mark where it will go.
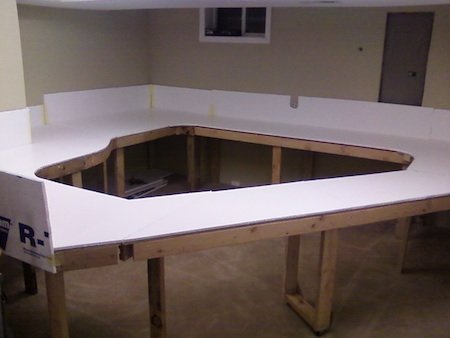
Now after bonking my head 4-5 times I realized that I don’t want to crawl under this thing any more I need to build in some type of gate. So… wahla! I made a gate. The Build was done… 3 days and about $60. (I had to buy four 8 foot 2x4’s, and 5 sheets of ½ in foam board, and some wheels for the gate supports.)
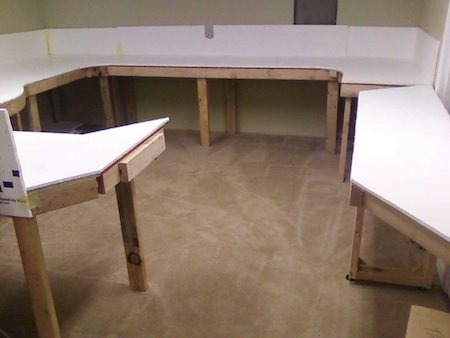
Well that’s about it for now I will add more later…
To Be Continued…
February 21, 2010
From "Building My Empire" to "Showcase"
From "Building My Empire" to "HomePage"
Contact Me | Blog | Photos | References | Supplies | GiftShop | Sitemap | Search | Comment | Privacy Statement | Disclosures


