on How to Build an Empire
 |


Sept-Oct 2021
Tracks-9-21 -- Model Railroading Newsletter
Sept-Oct 2021

Building Your Model Railroad:
Tips, Techniques and Information
for All Ages and All Gauges
Articles in This Issue:
- Crazy Old Train Movies
- Getting Started in 3D Printing
- Installing Dwarf Signals
- Using 3D Printing and Laser Cutting to Make an Industrial Building
- Railcar Weights - How Much to Use
- Chesapeake Bay and Western Railroad - Yorktown, VA
- Installing Lights on Your Layout (without Just Plug)
- A Review of the Just Plug Lighting System
WELCOME to the newest issue of Tracks - a bimonthly newsletter published by Building Your Model Railroad, devoted to providing breaking news and tips to model railroaders of all ages and all gauges in a quick and easy-to-read format. Resources are always credited where appropriate.
Whitelisting the email address of this newsletter is important. It assures that it doesn't end up in your Junk or Trash box every month. Please right click on the email address of the sender, copy the link and then go to your contacts program and paste it there as a new contact. You only have to do it once.
Note: √= sponsored link - See disclosure page for details. If you see a √ next to a link on this page or on the BYMRR.com site, that signals that the link is an ad. So if you click on it and purchase something, I might get a small (very small, I might add) commission on it. Just so you know.
Requests: If there are any particular subjects that you would like to see in the newsletter, please let us know at [email protected]. Even better, if you have a tip or something you would like to add to the newsletter, please send it in! Use the form in the Comments section of the BYMRR website.
*Videos: One of the most common requests that I get from the survey is to show more videos. I have included several in this issue and will continue to do so as it seems to be appropriate. Incidentally, if you have not already done so, you may want to consider upgrading to YouTube Premium, mostly so that you can play the videos without having to watch the ads. The videos displayed here are carefully selected for their educational content and fall under the fair use copyright code. Showing them here does not cause any economic harm to the creators and BYMRR makes no income from them. If you see your video displayed here and prefer that it not be displayed, please let me know and it will be removed immediately.
Back Issues: And don't forget, there is a huge amount of information in the 33 issues of the old newsletter called BYMR-Zine as well as previous issues of Tracks. Back Issues are available here.
Thank you for subscribing. We have lots of new tips and tricks in this issue to add to your model railroading pleasure. And please tell your friends about us. The more we can spread the word about model railroading, the better.
Photos: We're always looking for new photos for our Gallery pages. If you have photos of your layout that you would like to share with other model railroaders, I'd love to post them on the site. Send them in to [email protected].
Contributions Encouraged: If you have a tip, picture, video or an article about model railroading that you would like to share in this newsletter, please let me know. I'm always looking for more information.
Interior Building Lights
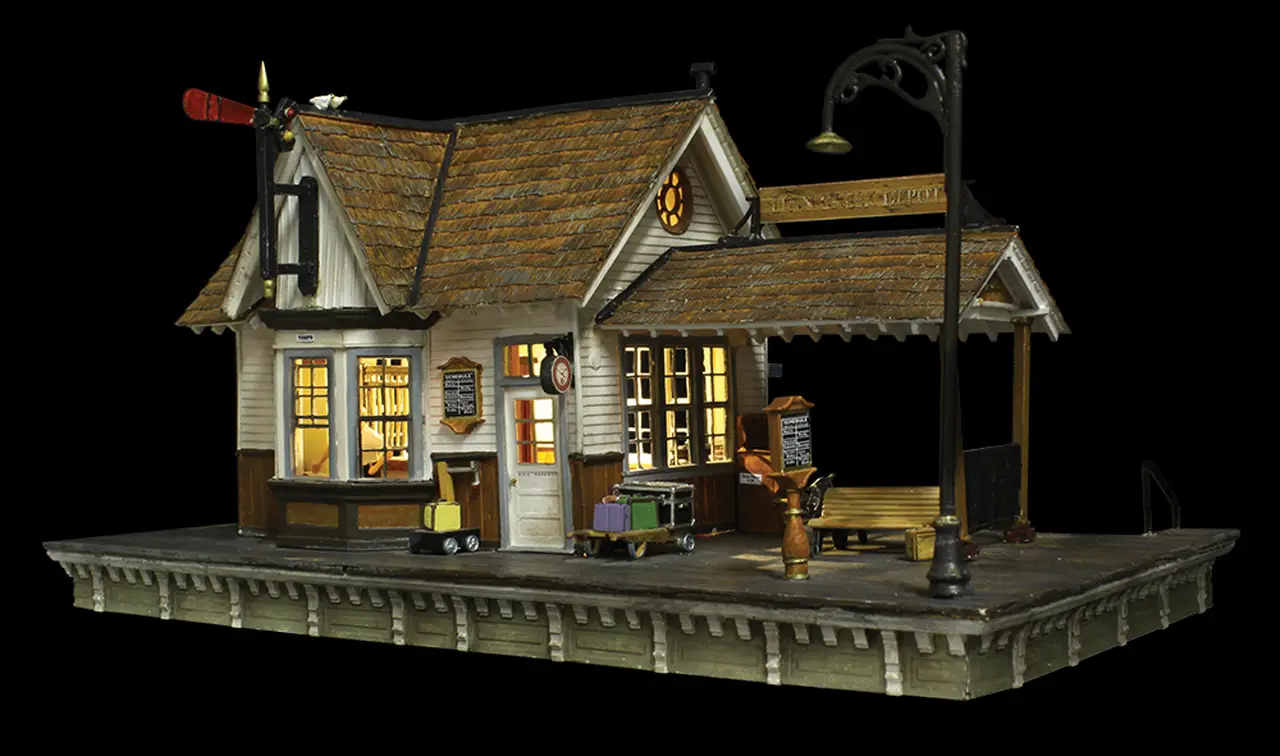 Woodland Scenics Lighted Building Available at Trainstoreonline.net
One of the most dramatic ways to improve and upgrade your model railroad layout is to add lights to your buildings. They really make your layout come alive and makes it seem as if real people might be living there.
The first thing to do is to prepare your buildings for interior lighting. We don't want to have buildings glow with light leaking through the walls. We only want to see the light shining in the windows. So we've got to either paint the inside of the walls (and roof) with a double coat of black, or cover them on the inside with black tape, so that the light cannot leak through. If we do the latter, then we have to be sure to cut out rectangular holes for the windows after the tape is applied. The best time to do this, of course, is before assembly. It can be done afterwards, but it's much more difficult.
The next thing to do is to create an interior for the building so that when we look in the windows, we see curtains, wallpaper, furniture and people. We could add most of these items, or we could use a properly sized non-glossy picture that has those images taped to the back wall of the room we are lighting. If your kit contains clear plastic windows containing images of curtains be sure to use those for added realism.
The lights themselves can be very inexpensive, such as remote-controlled, dimmable white or amber LED Christmas lights. The spacing between the lights may not be correct for your buildings, which are different lengths apart than the lights on the wire, so we might have to do a little wire cutting and splicing. Or, you could just buy the separate LED diodes with resistors included. The light wire should be coming from the bottom of the building and taped high on the inside of one of the walls or even taped to the inside of the roof. It's more realistic if the light bulbs themselves cannot be seen from the windows. Depending on the structure, we may need more than one light in each building - perhaps one light in each room. It's probably better just to have some of the rooms lit but not all.
The power source can either be from track power, or directly from the transformer or from a 9-volt battery. The problem with using track power is that the lights may flicker while running trains which are using up some of the current - more at some times than others. So a constant current is preferrable. If we try to power too many lights from a single power source, the lights may be too dim or not come on at all. If you have a large layout, you may want to have your lighting set up in 3-4 power districts each powered by its own source. This would come in handy for troubleshooting as well. Be sure that the voltage you are supplying is not too much for the bulbs you are using. The package the bulbs come in should tell you the proper voltage. If the lights are arranged in parallel, then if one light blows out, the others won't be affected. If they are arranged in series, if one goes, they all go.
If the lights are set up in different districts, we could set it up so they would come on automatically when a train is detected on the track in front of the buildings. If you have optic or infrared sensors that detect the presence of a train at a certain location, the sensor can be wired to a relay switch (between the power source and the lights) and turn the lights on automatically.
For a little more cost, we could buy the Just Plug system by Woodland Scenics, which makes everything easy, like "plug-n-play", with warm dimmable lights. Plus it's easy to add street lights, search lights, outside lanterns, and lighted vehicles. These can also be powered by a battery or by a transformer.
References:
Learn More about Model Railroad Buildings and How to Place Them and Wire Them.
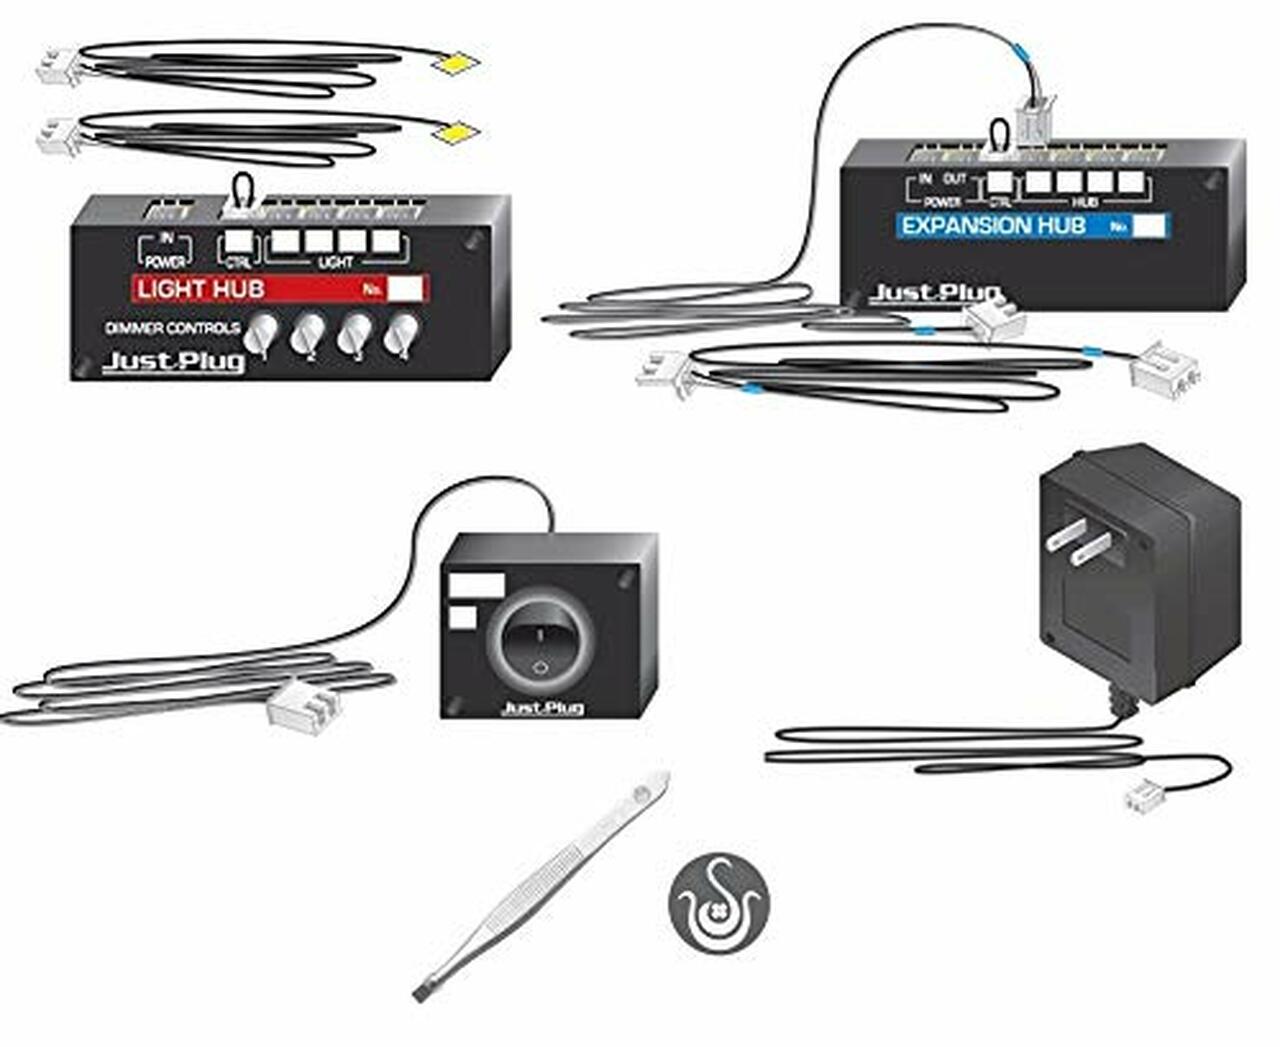 √Woodland Scenics Just Plug Lighting System, Light Hub, Expansion Hub, Auxiliary Switch and Power Supply with Spice of Life Tweezers
Modular Layouts
Many model railroad clubs like to create modular layouts, especially if they don't have a regular place to house a permanent layout. Modules are portions of a layout that are each made by the individual members of the club. Each module contains the benchwork to support it and a small scene with trackage on the top surface, and has to be built to conform to certain dimensional standards such that when the club wants to get together for a train show or an operating session, the members can bring in their modules and they will all fit together to make a nice large layout.
There are different types of modules:
The standard NMRA modules are built according to the specifications developed by the National Model Railroad Association. These modules are all the same except perhaps for the scenery on top. The dimensions of the module have to be the same as every other module and the track has to enter and leave the module at exactly the same points so the members will be able to connect the trackage between all the modules in the same way. The corners are done differently, of course, but also have to conform to NMRA standards, so that they can connect seamlessly to the standard modules. This allows the members to have operating sessions on a large layout even though they only built a small portion of it.
Sectional modules are also built as a portion of a larger layout and are also portable. The difference is that each sectional module has to fit into one certain spot on the layout and won't fit anywhere else. This allows for more variability in the layout track plan when the whole layout is put together.
Transitional modules are ones that will fit together with an NMRA standard module on one side and will also fit with a particular sectional module on the other, so the club can connect a line of NMRA standard modules to a line of sectional modules with a transitional module in between.
If you want to see what a module looks like, check out this page on the NMRA website.
If you want to join a club in your area that does a modular layout, you may want to call and ask to attend one of their sessions so you can get an idea of how it works and obtain a data sheet on what the standards are so you can start building your module according to their specifications.
Train Cameras
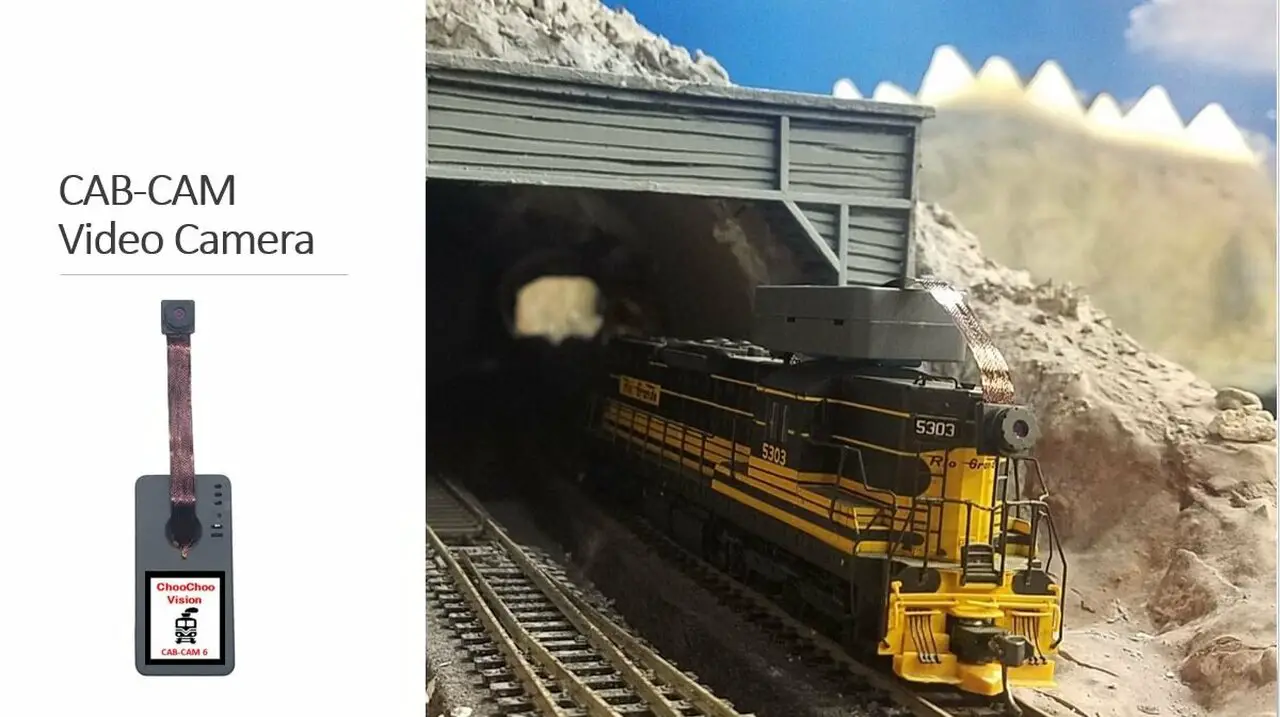 √Cab-Cam Video Camera mounted on the top of a locomotive to give an engineer's viewpoint of this model railroad layout.
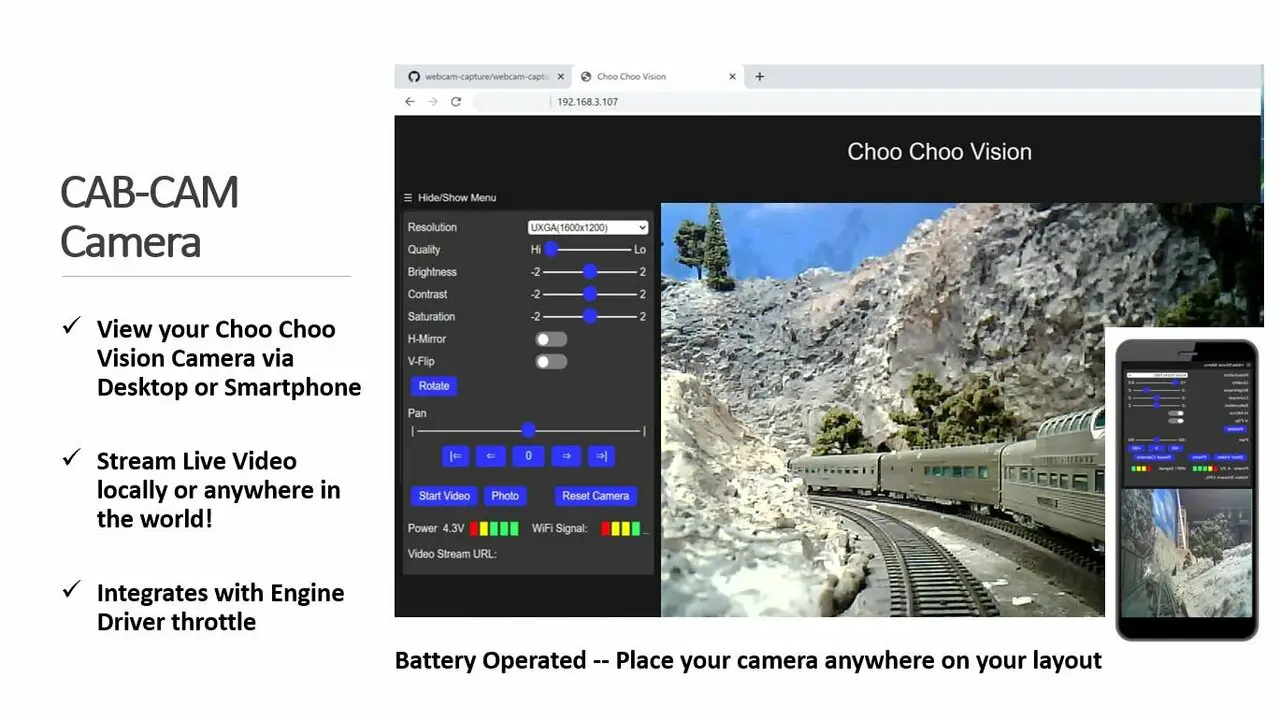 View of video screen being transmitted from the camera.
A lot of us model railroaders have been trying to create videos of our layouts from the engineer's cab perspective using small security mini-cameras that are difficult to mount onto our locomotives and are very non-prototypical in appearance. So I was excited to discover a new tiny, micro-sized WiFi camera that has been made specifically for us model railroaders with the following features:
~ This camera lens can fit right onto the inside of the cab window of the locomotive (HO scale or larger), or inside boxcars, or it can operate as a flatcar load. It can be also be hidden inside buildings or in scenery anywhere on your layout.
~ The camera can be powered either from DCC track power or from an onboard rechargeable backup battery.
~ It can stream live video directly to your web browser or mobile device.
~ You can stream real-time video from your engine cab to remote viewers anywhere in the world with no more than a 1-second delay.
~ Run remote operating sessions.
~ Monitor your trains in hidden staging yards.
~ Share layout videos and photos with family, friends, and other model railroaders.
~ Magnetic On/Off - Swipe a magnetic wand over the camera to turn it on or off.
~ You can immerse yourself right into your own layout empire by visualizing what you would see if you were actually sitting in the cab of the locomotive or railfanning at trackside.
~Eye level photography for model railroading has never been better!
Click the link below to learn more...
Continue reading "Model Railroading Video Solutions"
I purchased two of these cameras myself, one Cab-Cam and one Stationary Railfanning Cam (Trackside Camera). I have truly enjoyed being able to travel around my layout as if I were really there in the cab. The stationary camera is great for just moving it around anywhere on the layout to capture the action from ground level. You get views that you wouldn't be able to see otherwise. Make sure you have a good WiFi connection in your train room in order to get the best picture quality.
The only downside is that now I can see all the problems with my scenery that I have to fix! But that's also an advantage, because I now know exactly where the trouble spots are and what I have to do to fix them. The stationary cam is also great for troubleshooting derailments and turnout problems.
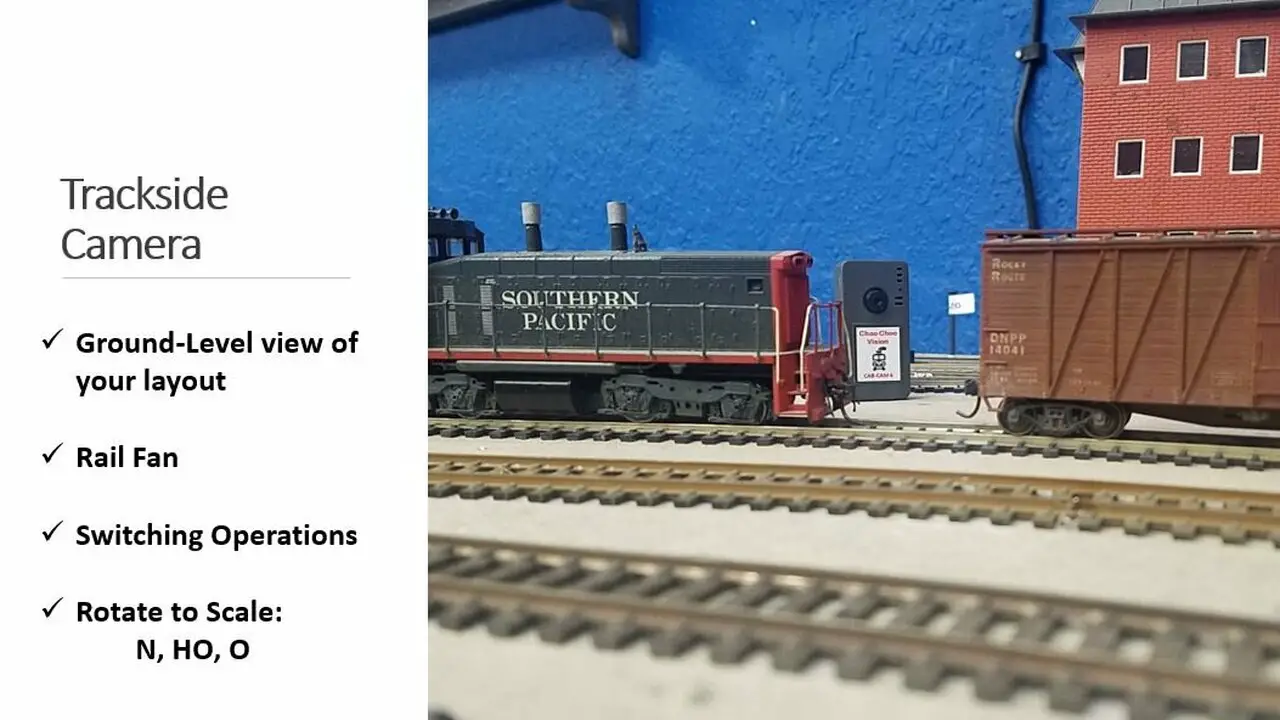 Trackside Camera - Move it around anywhere on your layout to get close-up ground-level action.
3D Printing
 Flashforge Adventurer 3
I just recently purchased my first 3D printer.
There are so many on the market, it was hard to choose. But I researched them as much as I could and finally narrowed it down to the Flashforge Adventurer 3 for various reasons. I didn't want the kind where you have to prepare the liquid resin, pour it in the top, and when the final product comes out it has multiple supports that have to be removed, and some of them leave small disruptions that you have to try to sand off, cut off or otherwise hide. It's too messy and time-consuming for me.
I wanted something that would provide great detail, that was enclosed and where there wouldn't be any disruptions in the plastic that you would have to remove or hide. Also I didn't want one that would break the bank. I watched several videos of different products and was most impressed with one of them that demonstrated how to make a small railcar by a first time user. This was Flashforge Adventurer 3. I went ahead and purchased one of these and I must say, I've been very pleased with it so far. When I received it, I was happy to see that there was a spool of red PLA 1.75mm filament included in the box so I didn't have to buy any to get started.
I followed the directions for setting up the device very carefully. It was relatively easy and straightforward and within a short time I had my first print out of a sample small red box that was very detailed on the inside and out - perfect in every detail.
I'm now in the process of learning how to use the free Google software called Sketchup to make buildings. My first project will be a log cabin in N scale. I'll let you know how it goes.
Here is a product review by the "3D Printing Industry". (The price has dropped since this review.)
See the videos below to learn more about 3D Printing.
Rail Car Weights & Wheels
In order for your railcars to run properly on yours or any other layout, they have to be weighted properly or they will be the source of constant derailments. If the cars have the proper weight, they can often run over uneven tracks and turnouts without much trouble. Brand new rolling stock that you buy in the store or online, even from reputable manufacturers, will almost never be properly weighted. Lighter weight cars will bounce over uneven track. Over-weighted cars are too hard to pull up a grade, leading to spinning wheels on your locomotive.
Did you know that if your railcars are not the proper weight, most clubs won't let you run them on their tracks?
So what is the proper weight? Of course, it's different for different scales. A formula has been created by the NMRA (National Model Railroad Association) including most of the popular scales and is shown on this page...
You may want to print that page or at least write down the formula that pertains to your scale.
As an example, I'll use one of my N scale cars, which is 4 1/4", or 4.25" long in body length (not including couplers).
Looking at the NMRA table, the "Initial Weight" for N scale is a minimum of 1/2 oz, or 0.5 oz.
The "Additional Weight" I would have to add to that is shown as 0.15 times the inches of body length, or 0.15 x 4.25 = 0.64 oz. (Note: This is not yet the actual weight to be added, unless your car out of the box is truly 0.5 oz.)
So, this car should weigh a total of
0.5 + (0.15 x 4.25) =
0.5 + 0.64 = 1.14 oz. (This would be the optimal weight of your car.)
If your car actually weighs 0.7 oz., then you have to add
1.14 - 0.7 = 0.44 oz. to bring it up to optimum weight.
It doesn't have to be precise, so I would round it up to 0.5 oz. of weight to add to your car.
Where do you get the weights? Most people like to use fishing tackle weights (smashed with a hammer to become flat), or BBs or pennies or anything else you can think of for that matter. You can even buy weights for this purpose. Distribute the weight evenly in the bottom of the car more toward the center. Glue them down to prevent them from shifting from one side to the other.
When you finish with weighting your car properly, why not take this opportunity to replace those plastic wheels (which are bad for your tracks by the way - they leave a residue) with metal wheels which also are much better at holding your car on the track and preventing derailments.
While you're at it, replace those horn hook couplers with magnetic knuckle couplers if they are not already installed. If you want to operate your layout properly with the ability to uncouple cars easily to drop them off at various places, this is the way to go.
When you're done with that, add a little weathering, maybe some graffiti, to add some realism.
Now you've got a railcar that you can be proud of. Take it to the club and run it with the best of them.
The only thing better is to scratch build your own unique rail car, but that's another story.
More Great Videos:
Crazy Old Train Movies
Getting Started in 3D Printing
Installing Dwarf Signals
Using 3D Printing and Laser Cutting to Make an Industrial Building
Railcar Weights - How Much to Use
Chesapeake Bay and Western Railroad - Yorktown, VA
Installing Lights on your Layout
A Review of the Just Plug Lighting System
Check out our Hobby Central Train Station for all your train supplies - everything you need to build your own model railroad. (Also available: RC cars, trucks, planes, helicopters, games, puzzles, tools, gifts and more.)
- FREE SHIPPING on most items for orders over $25.00.
- Competitive pricing - especially considering free shipping.
- New discounted products added every day.
- Join our Empire Points Program. Earn 3 points for every $1 you spend. Use the points you've earned to get even greater discounts on future purchases. Get 100 points just for signing up!
Hope you enjoyed this issue of Tracks. Feel free to pass it on to your friends, family and other model railroaders. If you have a great tip or article that you would like to publish on the website, please let me know - The more, the better. Any comments or suggestions are always welcome. You can either go to the Comments/Contact Page and enter your suggestions there or contact me directly at [email protected]
Thank you for your support and for subscribing to the free newsletter for Building Your Model Railroad.
And, as always, thank you for visiting the BYMRR website at
https://www.bymrr.com. We are committed to providing all the newest techniques, tips and articles to help YOU build your own great model railroad!
Take care and be safe.
Greg Warth
Survey
Tell us what you think...
Back to Home Page
Contact Me | Blog | Photos | References | Supplies | GiftShop | Sitemap | Search | Comment | Privacy Statement | Disclosures
Tracks Newsletter: Sign Up Here!
√ = ad or sponsored link
What's New on BYMRR.com?
Recent Articles
-
15 piece train set
Nov 24, 24 07:47 AM
I was given this train set from a uncle that passed away im not sure what it is worth but i no its a N scale model and the hobbie is quite expensive so -
Lionel Miscellaneous
Nov 24, 24 07:42 AM
I have miscellaneous Lionel trains and accessories that I would like to sell. You can view more photos at www.EastHarbor.net/trains.pdf Please call or -
15 piece train set
Nov 24, 24 07:40 AM
I was given this train set from a uncle that passed away im not sure what it is worth but i no its a N scale model and the hobbie is quite expensive so


