| Back to Back Issues Page | |||||
 |
|||||
|
BYMRR-Zine, Issue #022 -- Model Railroading Newsletter November 01, 2012 |
|||||
Building Your Model RailroadNewsletter - October-November, 2012
Thank you for subscribing. We have lots of new tips and tricks this month to add to your model railroading pleasure. Sign Up: If this has been forwarded to you by a friend and you have not yet subscribed, click here to get your own version sent to your email box free of charge every month. Send in Your Tips/Comments/Suggestions: Let me know if you have any tips to pass on to other model railroaders. Just type them in on the Comments Page of the website or send me an email directly to [email protected]. In addition, if there is a particular topic you would like to see appear in the newsletter, let me know about that as well. Photos: We're always looking for new photos for our Gallery pages. If you have photos of your layout that you would like to share with other model railroaders, I'd love to post them on the site. Send them in to [email protected]
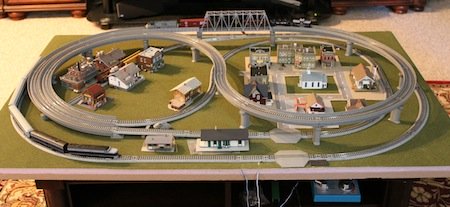
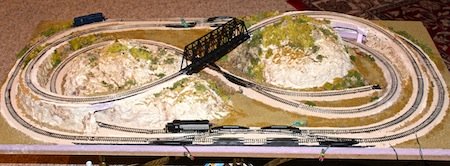
Startups Kato tracks are a great way to get started in model railroading. The tracks fit together flawlessly, which really reduces the risk of derailments. They can be purchased as individual pieces, and they also come in a variety of kits that can be combined to form any type of track plan that you want - from a simple oval up to a complicated double-twisted dog-bone, or anything in between, including viaducts, bridges and stations. You can get your trains up and running very quickly after laying the tracks. The scenery and details can be added at your leisure later, but at least you have trains running without a lot of hassle. They also sell DC transformers and built-up structures that can help reduce the startup time. Wiring is as easy as "plug-and-play", even for turnouts. As you get more sophisticated, you can always change to DCC later. And you can make it as large as you want by adding on more sections as time goes on. The following is a picture of a a small layout assembled with Kato tracks in fairly short order - mostly in one evening for the tracks and wiring. The structures took a while to build. About half of them shown here are kits that had to be assembled and painted and half are built-ups from Woodland Scenics. Many more details need to be added of course, like bushes, trees, roads, terrain modification, cars, people, etc. But it was fun getting everything up and running quickly. If you don't have the time or the patience for a layout that takes several years to create, this is for you!
Organize Your Workbench I'm not very organized sometimes when it comes to tools, paint supplies, and myriads of other stuff that we need ready access to when we're involved in a model railroading project. At the end of a "work" session, I frequently just leave the tools laying on the bench or wherever I was using them. As a result, I spend a lot of my time just looking for stuff - certainly not a very efficient way of getting anything done. So, I read the article "Organization and Storage", by Bob Walker in the October, 2012 issue of Railroad Model Craftsman with great interest. I ultimately resolved to better organize my working area so that the work would go faster and be even more enjoyable. I thought this would be a great tip for all of us so I included it here. The picture in the article shows shallow shelves from ceiling to floor that are just wide enough to hold small bottles of paint and multiple holders for small hobby tools. Also there were rows of labelled small file boxes containing an assortment of all kinds of small parts - "a place for everything and everything in its place". This is really important, especially for our hobby where there are so many little tools, parts and bottles of things that are easy to lose. I'm converted! From now on, everything goes back to its proper place at the end of the work session!
Books on Building Scenery Several books, DVDs and numerous articles on how to build model railroad scenery have been written and/or created by Paul Scoles. His expertise is readily evident in the pictures printed in those materials. There is now a new book by him called simply Building Scenery which promises to be another excellent source of tips and techniques that can help us produce fantastic scenery for our model railroads. It's available for order at www.carstensbookstore.com.
Wheel Cleaning Locomotive and rolling stock wheel cleaning just got a whole lot easier with Woodland Scenic's Tidy Track Roto Wheel Cleaner System
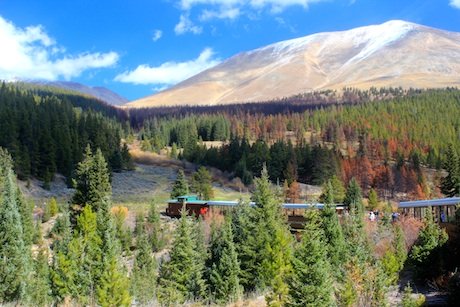
Leadville, Colorado  I really like visiting old railroad depots, train museums and restored railroads even if they are a little "touristy" sometimes. But, when I go I always learn some fascinating history and usually get to climb aboard a locomotive or railcar or maybe even take a short train ride. Many of these rides are fantastic little journeys into some of the most beautiful landscapes in the world. I previously rode on the Georgetown Loop in Colorado on a steam train which was a real thrill, going over lots of bridges and tortuous terrain that would be awesome to model. I've also ridden on the Cass railroad in West Virginia, which was a great close-up demonstration of how logging railroads used switch-backs to climb steep mountains, not to mention the beauty of the autumn vistas that we took in while we were there. Most recently, while in Colorado, I had the great opportunity to visit the restored depot in Leadville and ride the Leadville, Colorado and Southern Railroad, formerly the Denver, South Park and Pacific Railroad (DSP&P), affectionately known back in the late 1800's as the "South Park", also known as the "Seldom Punctual". The South Park was painstakingly built over 10 years (1874-1884) at an elevation of 10-11,000 feet during the Gold Rush over rough regional terrain to haul tons of gold, silver, coal, lumber and molybdenum out of the mountains, not to mention transporting food, supplies and passengers back and forth. The last run was in 1986 carrying Molybdenum from the Climax Mine to Leadville. The views from one of the open cars on this ride were nothing less than spectacular, especially in the fall when the aspen trees were bright gold and shimmery in the October sun. The leaves even looked like gold coins. I took lots of pictures as the guide told about the history. Whenever you get the chance, I would heartily recommend visiting one of these railroads. It makes for a very enjoyable family event, a wonderful learning experience and even better, it can give you great ideas for your model railroad layout at home!
Short Tips ~ Attach mountain climbers to your mountains or cliffs. ~ Use "gravel" (sand and small pebbles) in a steep depression along a mountainside to form a landslide. Put a sign up along the tracks or road below saying "Danger! Falling Rocks". ~ Use stone or granite textured spray paints to make stone walkways, road, retaining walls or even as a base paint before laying track. Once I used a green textured paint to simulate grass over a large area. Then used a thin layer of ground foam for even more texture and variability. ~ Next time you build a house from a kit, leave off one wall and the room. Then glue in a wood frame for the one missing wall and for the roof. Put construction workers, trucks and cement mixer all around the area to complete the look of a work in progress. ~ Use thin fishing line for telephone power lines, cable lines and wire fences. Paint them silver of black if necessary. ~ Use an old mesh garment cut up in small rectangular sections and stretch them between metal posts to make a chain link fence or to make a backdrop fence for a baseball park. Paint it silver or rust. ~ If you want to hide those unsightly Atlas turnout switches that sit on top of your layout, make a small loading dock for each one using small scale wood planks and 2x4's that you can buy from hobby shops. Or glue a lot of bushes on top of each switch - just be sure not to get any glue in the mechanism. ~ If your layout is powered by DCC, make a programming track that is separate from the rest of the track by putting a readily accessible line of trackage incorporated into your scenery such that both ends of the track end up in bushes or scenery that goes nowhere but looks like it goes somewhere. Or it could look like an old abandoned track that is no longer connected to the mainline. Or it could be attached to the mainline as a spur but with railgaps on both rails at the connection to be sure it is isolated from the main operating track.
Spotlight
This section is used to focus attention on outstanding model railroading websites or layouts. This month's spotlight is on Bob Logan's journey in model railroading, starting with Lionel O27 gauge, then switching to HO and finally ending up with N-scale. His excellent modeling skills are well appreciated in the pictures on the site....
(If you know of a layout, model railroad website or blog that would be a good candidate for entry into the "Spotlight" here, please send an email to [email protected])
Model Railroading Books!
Learn even more tips and techniques from these great
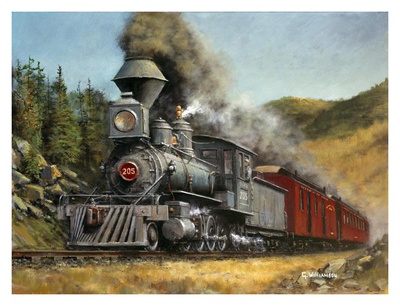
Great railroad posters and prints are available from art.com... ART PRINTS - Art.com! - (Type trains in the search box)
Hope you enjoyed Issue #22. Feel free to pass it on to your friends, family and other model railroaders. If you have a great tip that you would like to publish here, please let me know - The more, the better. Any comments or suggestions are always welcome. Don't forget to send in YOUR tips! You can either go to the Comments/Contact Page and enter your suggestions there or contact me directly at [email protected] Thank you for your support and for subscribing to the free BYMRr-Zine, the newsletter for Building Your Model Railroad. And, as always, thank you for visiting the BYMRR website at
-Greg Warth
|
|||||
| Back to Back Issues Page |

